Update Theme
Firstly, you need to download the new theme package from your Themeforest account. Once you have the new theme package, you can choose to upload the theme via WordPress or via FTP. Please see the information below for how to download new files, and install it via WP or via FTP.
Download new theme files from ThemeForest
Step 1: Log into your ThemeForest account and navigate to your downloads tab. Find the “Heli” theme purchase.
Step 2: Click the Download button next to it and choose to download the Installable WordPress file only which is just the WordPress file, or choose the All files & documentation which is the entire package that contains everything.

Step 3: Then you need to decide if you want to install the update via FTP or via WordPress. Directions for both methods are below
Update via Wordpress
Step 1: You need to deactivate the current Heli theme in Appearance >> Themes section by simply activating a different theme.
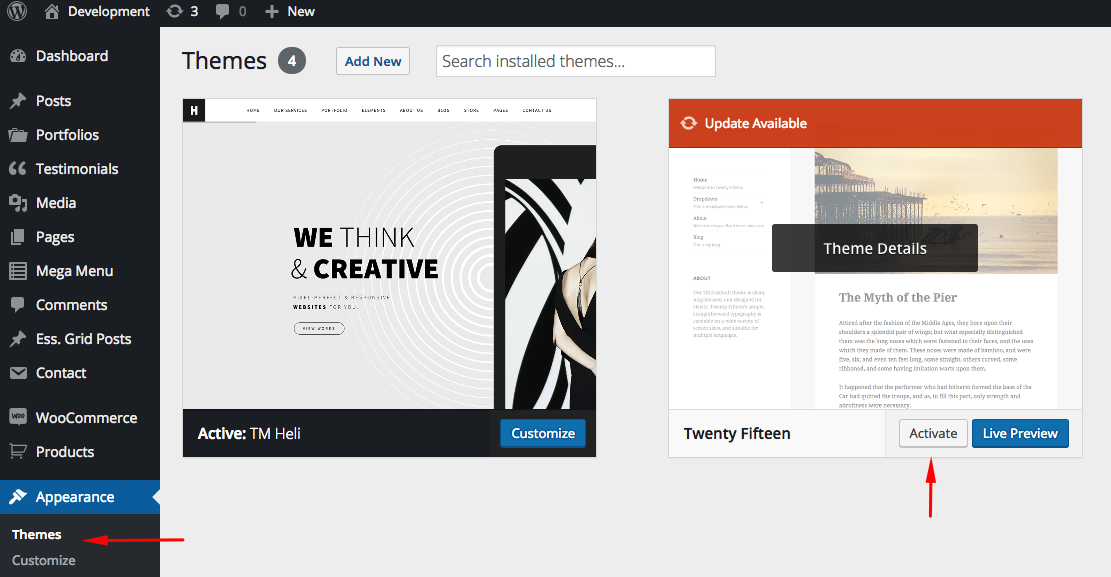
Once you activate a different theme, you can delete the Heli.
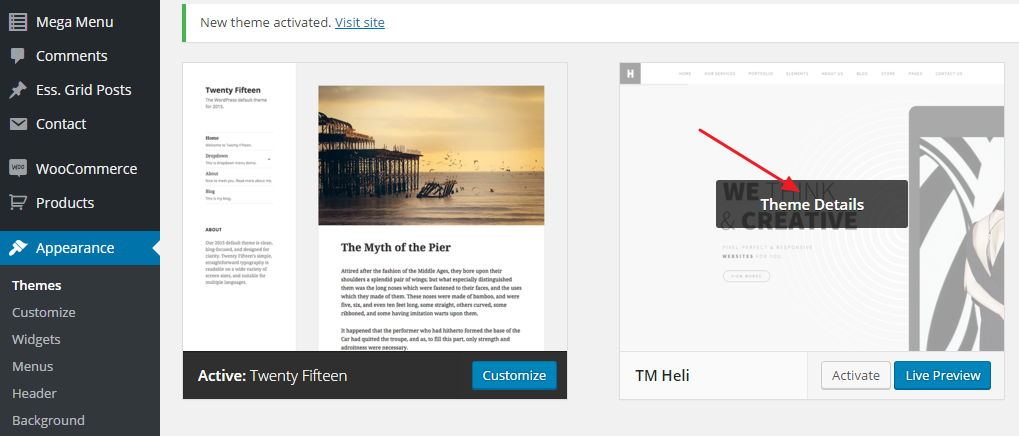
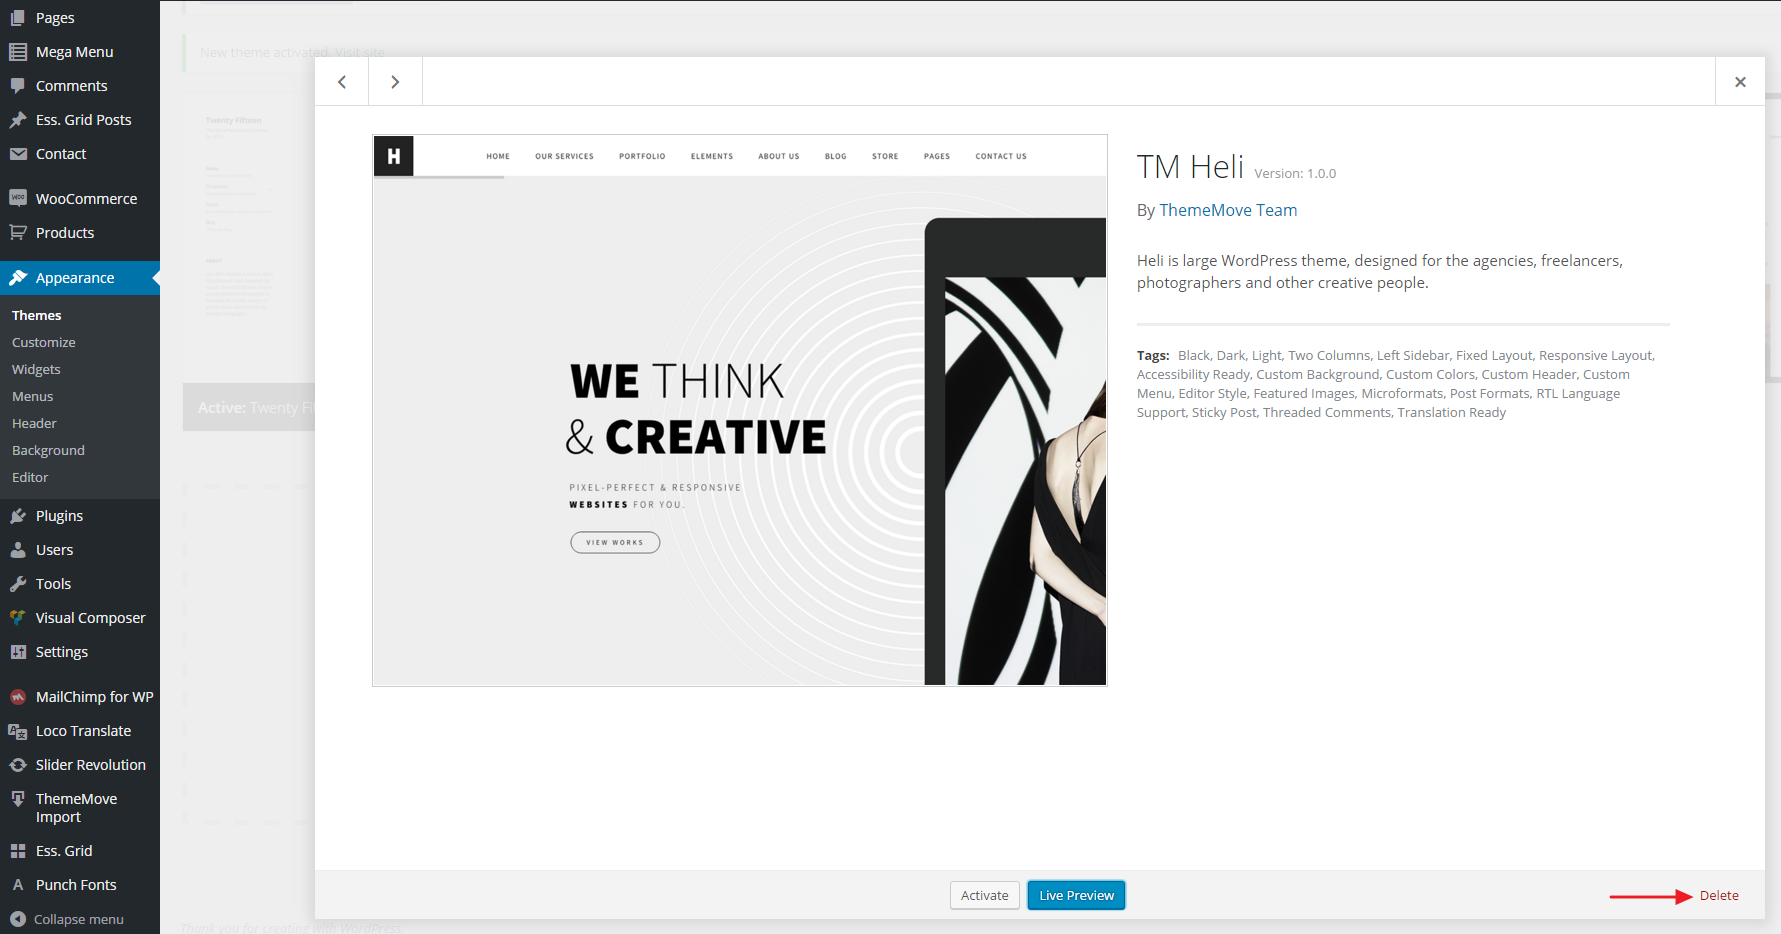
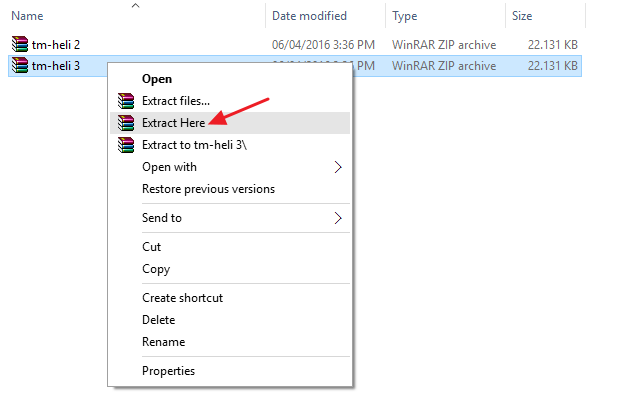
Step 2: Retrieve the tm_heli file from your new Themeforest download. If you downloaded the Heli package from Themeforest, then you need to unzip the archive file you received, the tm_Heli.zip will be inside of it.
Step 3: Then simply upload the tm-heli file in the Appearance >> Themes section. Click on the Add New >> Upload Theme tab at the top and choose to upload the zip file. Then choose to activate it. See more here.
Update via FTP
Step 1: Extract Heli theme on your local hard drive.
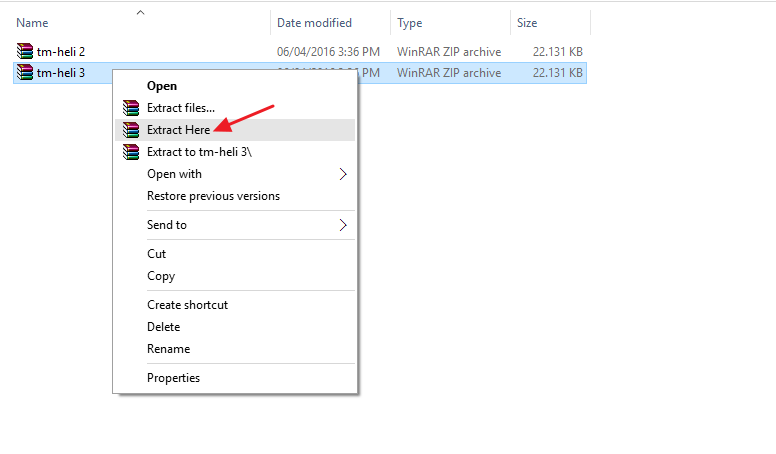
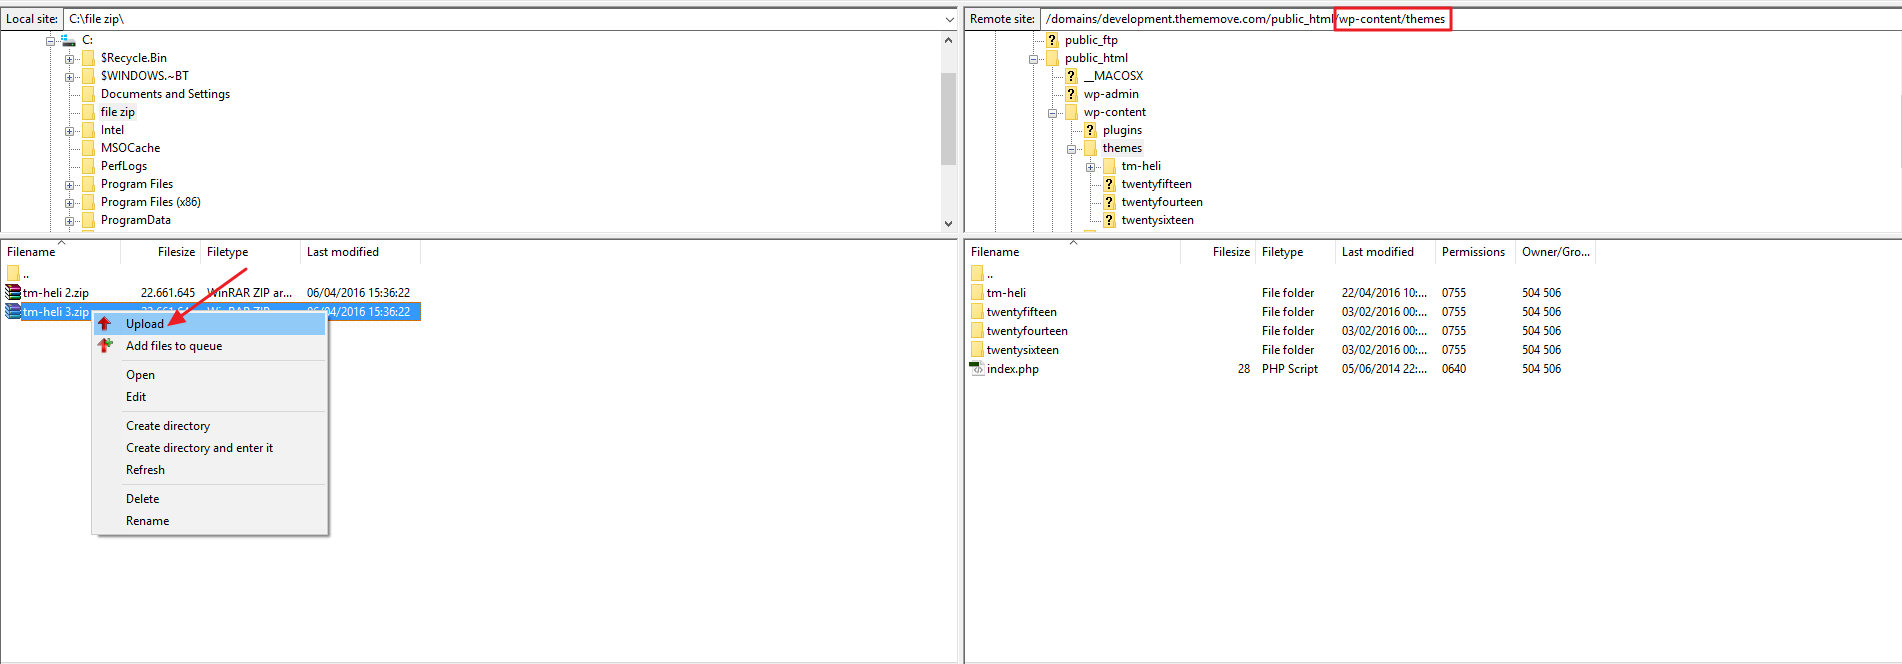
Step 2: Connect to your FTP
Step 3: Upload the extracted theme to: wp-content/themes/ And just replace existing files and folders.
Step 4: Lastly, update the included plugins. You will see a notification message letting you know the plugins have a new version and need to be updated. You should update the plugins. You can see Update Plugin for more details.