How to customize the Header Style?
Step 1: Navigate to Appearance from your admin dashboard then click Customize. Next, hit Header. You can see a list of available header styles.
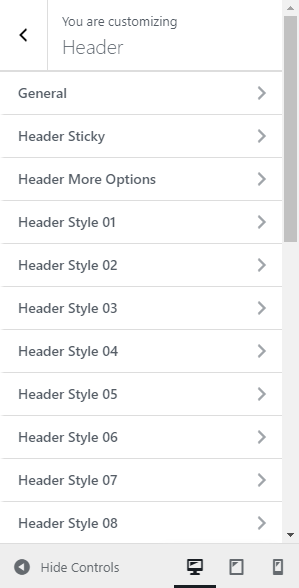
Step 2: Click on the header style you want to customize.
Step 3: Set the configurations listed on the left sidebar.
Note: If you have imported the demo, you will not be able to see the changes you made because the page already had a fixed header style. For your convenience, refer to the following list to find the corresponding header style of each page.
'Header style 01' =>"Standard"
'Header style 02' =>"Standard - Overlay - Light"
'Header style 03' =>"Right Nav - Overlay - Light"
'Header style 04' =>"Left Vertical Header - Canvas Nav"
'Header style 05' =>"Standard - Overlay - Dark"
'Header style 06' =>"Right Nav - Standard - Dark"
'Header style 07' =>"Minimal - Fluid - Overlay - Dark"
'Header style 08' =>"Minimal - Fluid - Overlay - Light"
'Header style 09' =>"Right Nav - Fluid - Overlay - Light"
'Header style 10' =>"Left Vertical Header"
'Header style 11' =>"Right Nav - Fluid - Dark"
'Header style 12' =>"Minimal - Fluid - Dark"
'Header style 13' =>"Simple - Fluid - Dark"
'Header style 14' =>"Left Nav - Fluid - Overlay - Light"
'Header style 15' =>"Minimal - Fluid - Overlay - Light - Alt"
'Header style 16' =>"Standard - Fluid - Overlay - Light"
'Header style 17' =>"Minimal - Fluid - With Center Socials"
'Header style 18' =>"Left Nav - Center Logo"
'Header style 19' =>"Standard - Fluid - Overlay - Dark"
'Header style 20' =>"Bottom Nav - Center Logo"
'Header style 21' =>"Left Nav - Center Logo - Overlay"
'Header style 22' =>"Standard - In Grid"
'Header style 23' =>"Bottom Nav - Center Logo 2"
'Header style 24' =>"Minimal - In Grid - Dark"
Step 4: After customizing, do not forget to click Publish button to save your changes.