How to Create a New Post
Step 1: Navigate to Posts > Add New in your WordPress admin sidebar.
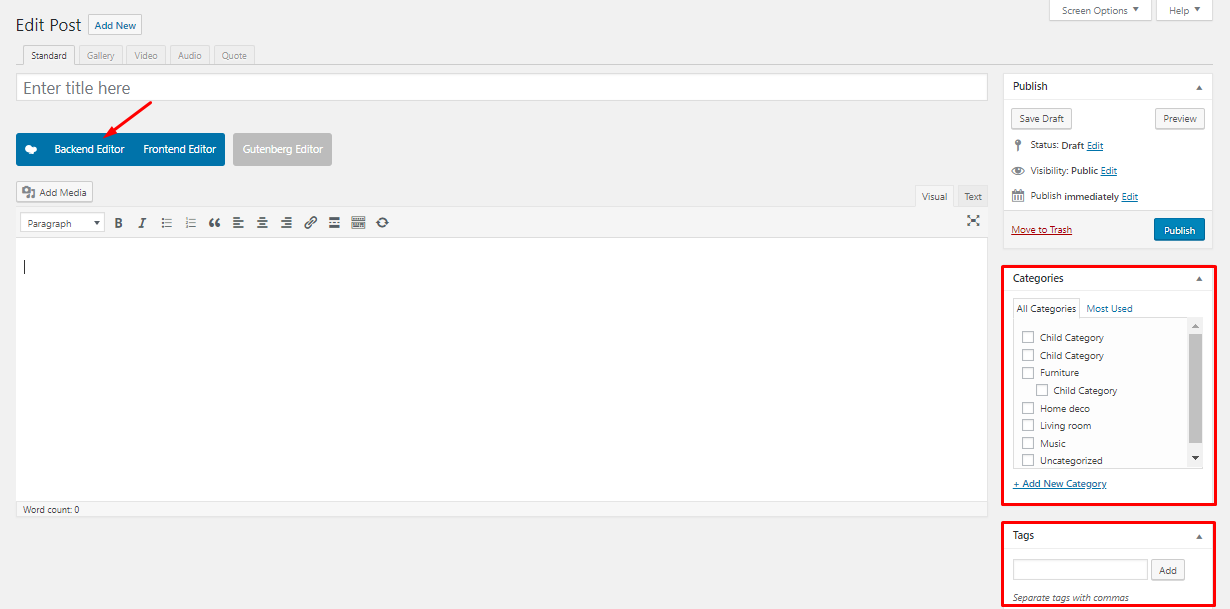
Step 2: Create a title, and insert your post content in the editing field.
Step 3: Click Backend Editor >> Add Element
Find the Element you want to build up your content
Step 4: Add Categories from the right side. Categories is meta information you create for the post. Each category is a meta link that your viewer can click to view similar type of posts. To assign it to the post, check the box next to the Category name. You can also access and edit Categories from the Post sidebar item in your WordPress admin sidebar.
Step 5: Add Tags from the right side. Tags is meta information you create for the post. Each tag is a link that your viewer can click to view similar type of posts. Type the name of the tag in the field, separate multiple tags with commas. You can also access and edit Tags from the Post sidebar item in your WordPress admin sidebar.
Step 6: For a single image, click the first Featured Image Box, select an image and click the Set Featured Image button.
Step 7: You can also customize Page Title & Sidebar Options in Page Options.
Step 8: Once you are finished, click Publish to save the post.
Here is the screenshot that shows the various areas of the blog post page:
