• Structure Documentation
    • Getting Started
      • Welcome to Structure
      • Theme Requirements
      • WordPress Knowledget Base
      • What's Included
    • Support
      • ThemeMove Support System
    • Installation
      • Theme Installation
      • Plugin Installation
      • Plugin Configuation
      • Demo Installation
      • Common Installation Issues
    • Update
      • Before Updating
      • Update Theme
      • General Update Notices
    • Build Your Site
      • WordPress Configuration
      • Theme Option
    • Page
      • Create a New Page
      • How to Setup Homepage
      • Use Visual Composer to Build Page
    • Menu
      • How to Create a Menu
      • How to Edit Menu
      • How to Add an Icon to a Menu Item
      • Mega Menu
    • Header
      • Header Setup
    • Slider
      • How to Create a New Slider
      • How to Edit Your Slider
    • Post
      • How to Create a New Page
      • How to Create a Category
      • Single Post Setting
    • Project
      • How to Create a Project
      • How to Filter my Project
    • Widget
      • How to Add Widget in Sidebar
      • How to Edit Widget
    • WooCommerce
      • Set up an Online Store
      • How to Customize Your Online Store
    • FAQs
      • What are Common Installation Issues
      • General Questions
      • How to change the Social Button
      • How to Change the Contact Information
      • I can't change default logo
      • How to Get PSD Files
      • How to Use Loco Translate
      • How to Change Logo Size
  • How to Add an Icon to a Menu Item

    Step 1: Go to Appearance > Menus. Enlarge the Screen Options and hit CSS Classes.

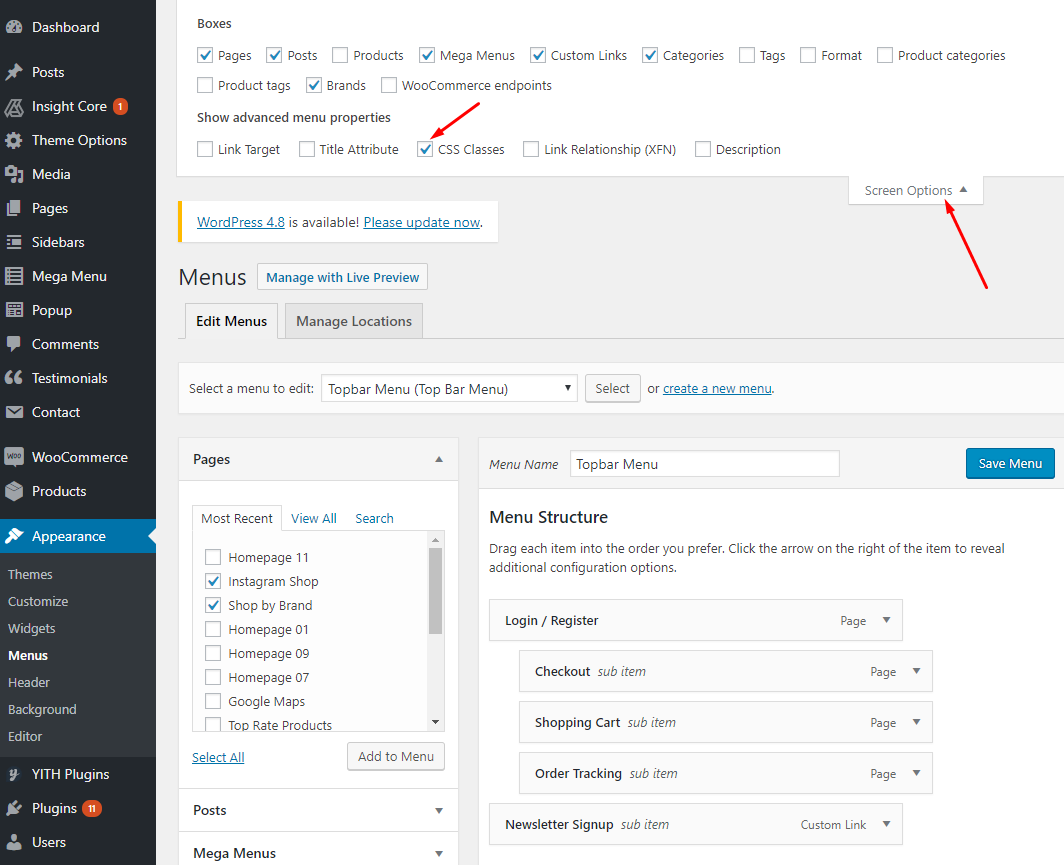
    Step 2: To get the icon you want, head to this site, tick on the icon you want. Then get the class name and paste on CSS Classes of the menu item you want.

    Remember to hit Save Menu. Head to your site to see the effect.

    How to Edit Menu
    Next: Mega Menu