Attribute Swatches
Step 1: Add a new attribute.
To add new attributes to a variable product on your WooCommerce shop, from admin Dashboard, navigate to WooCommerce >> Settings >> Attribute Swatches to check if the attribute that you want to add is available or not.
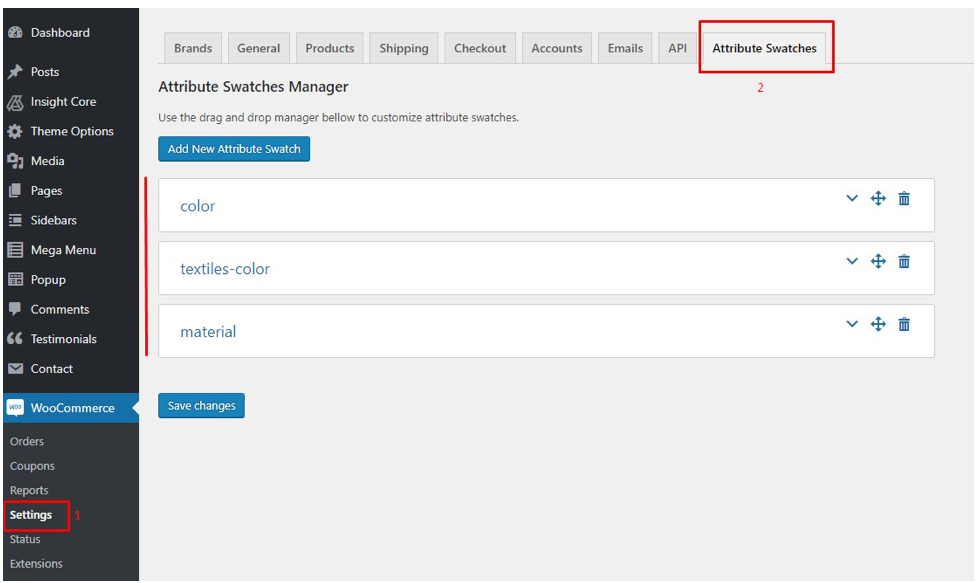
Here we’ve already had 3 attribute options: color, textiles & color, material. If these aren’t what you want, click Add New Attribute Swatch, then a new box appear for you to enter a new attribute for your products. At the right corner of the box are some buttons for adjusting your product attributes: the ˄˅ button is for expanding/minimizing the attribute box, the arrow button is for reordering these attributes (drag & drop to reorder), and recycle bin button is for deleting an attribute. In case you want the attribute to be displayed on Shop Page, tick in the box Show on products loop. If this is unchecked, your new attribute can’t be seen from the Shop Page, so customers won’t be able to see the product variations.
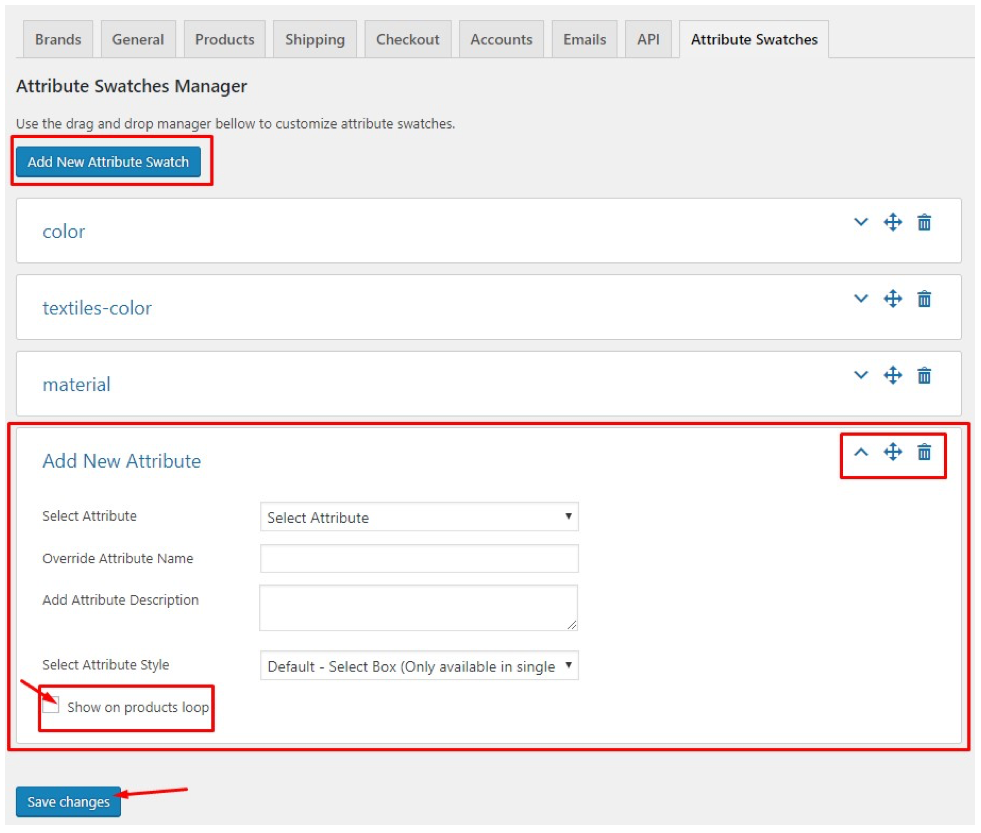
After filling in all the needed for the new attribute, remember to click Save Changes to save all of your changes.
Step 2: Add a new variable product
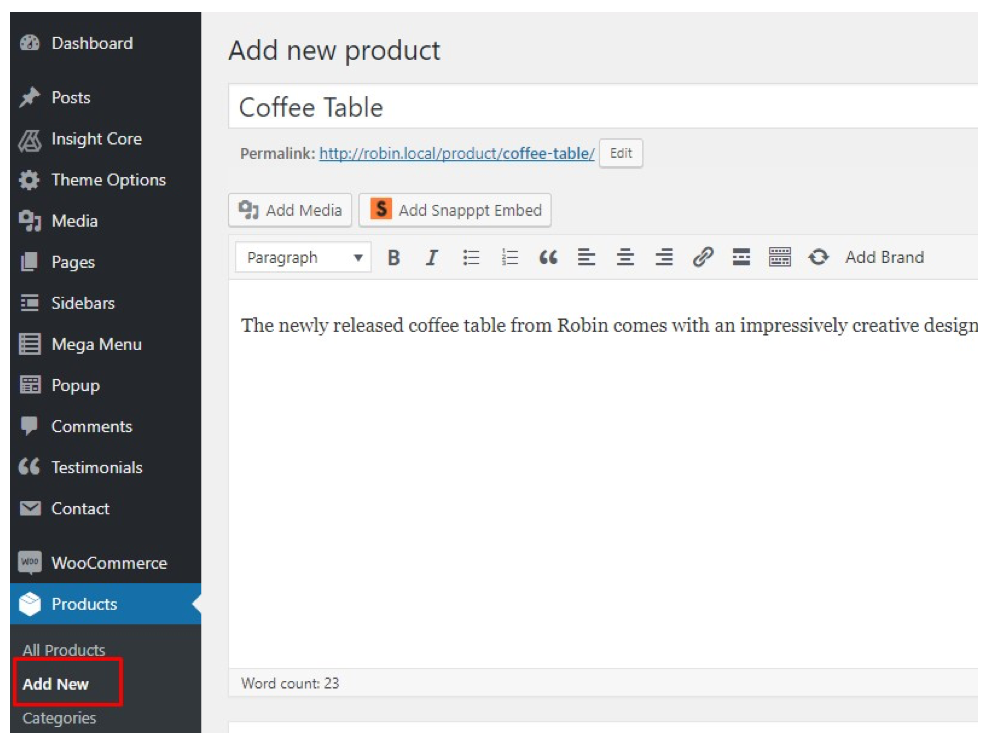
From the admin dashboard, navigate to Products >> Add New then fill in the product information, including product name, description, etc.
Scroll down to Product data, in the drop down menu, choose Variable product then all the available attributes for the newly added product will be displayed.

Below is the instructions on adding the color variations. To add new attribute variations, you need to add the attributes first.
Click Attributes, in the drop down menu, choose Color then hit Add. You can add color values from available options (Select All or Select one), or add a new color by clicking Add New button, enter a name then hit OK to finish.
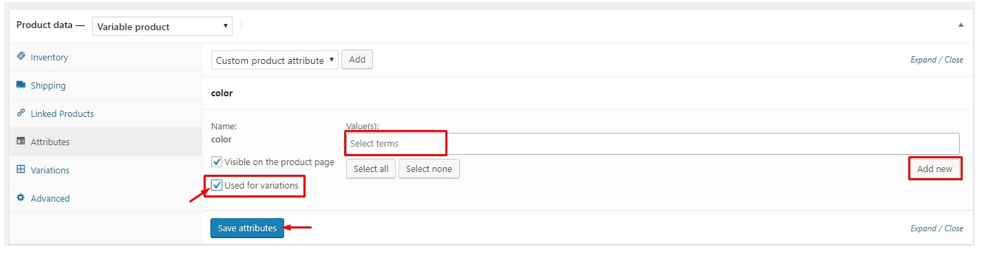
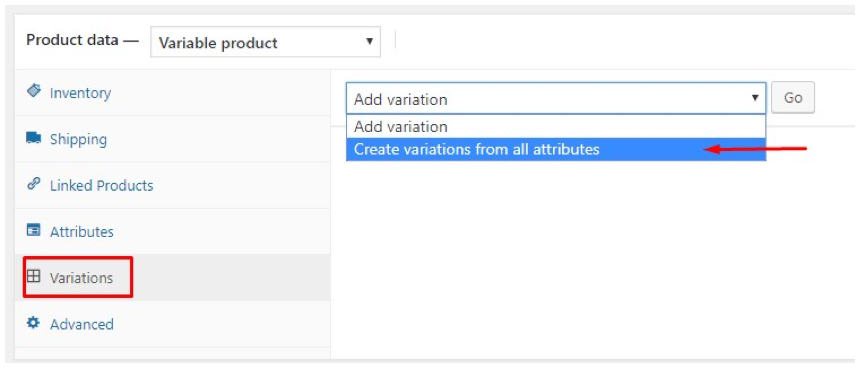
Note: That you can add multiple variations by repeatedly click in the values box and choose from the added colors in the box. Remember to put a tick in the box Used for variations. After that, click Save Attributes before proceeding. Now click Variations, in the drop down menu choose Create variations from all attributes then hit Go, in the confirmation box, click OK.
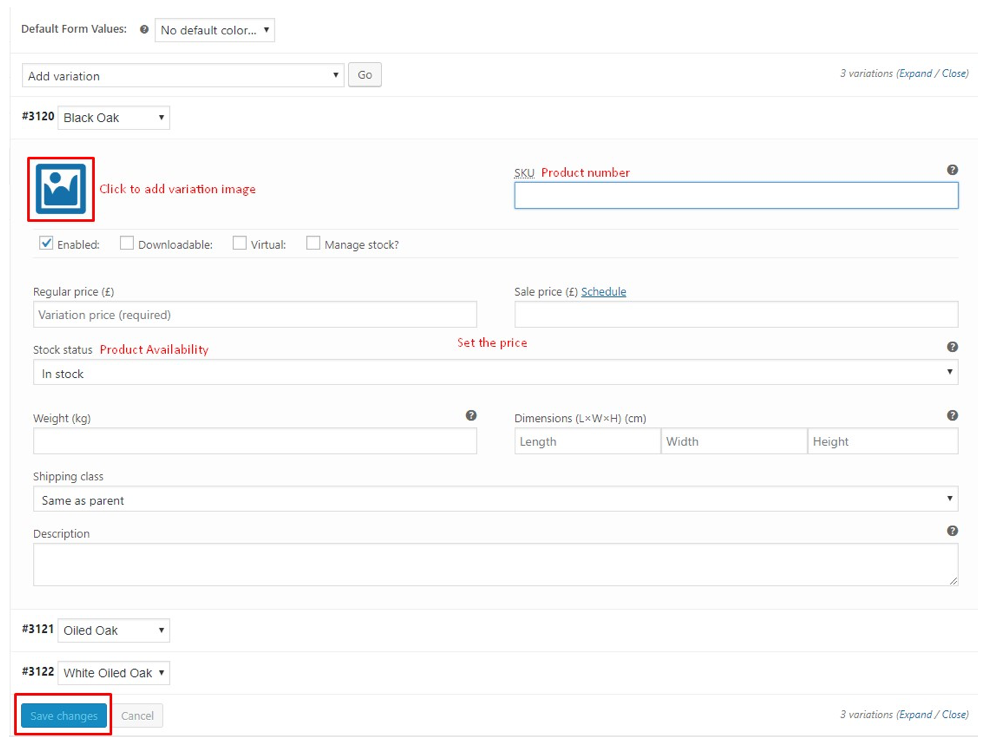
Click in a variation, you can set all the details for it, including variation image, product number, prices, etc. Hit Save Changes when done.
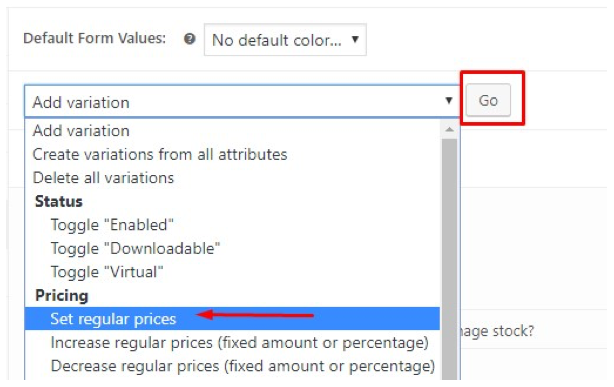
Tip: If all variations of your products have the same price, click in Add variation drop down menu, choose Set a regular price then hit Go to set a general price for all variations and save yourself some time. Hit Save changes before closing a variation.
Navigate to the right sidebar, click in the Product Image box, select a featured image for your product then hit Set product image. Finally, click Publish to finish. You can click View Product or go to the Shop page to preview your product.
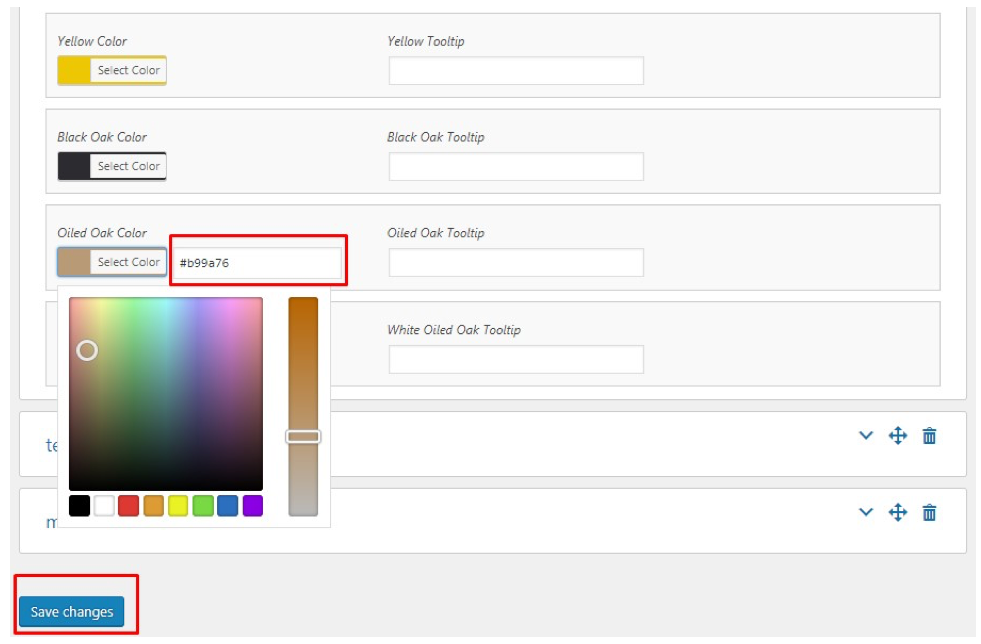
You can see that everything is set, except for the color variations. To make them visible, you need to set up the color for your newly added attributes. Go to WooCommerce >> Settings >> Attribute Swatches then click in the Color attribute, scroll down to find the newly added color variations. Hit Select color for each variation, if you don’t have the exact code, choose the closest color in the palette. Then hit Save Changes and check if it’s done in the shop page.