• Transport Documentation
    • Getting Started
      • Welcome to Transport
      • Theme Requirements
      • WordPress Knowledge Base
      • What's Included
    • Support
      • ThemeMove Support System
    • Installation
      • Theme Installation
      • Plugin Installation
      • Plugin Configuration
      • Demo Installation
      • Common Installation Issues
    • Update
      • Before Updating
      • Update Theme
    • Build Your Site
      • WordPress Configuration
      • Customize
    • Page
      • Create a New Page
      • Use WPBakery Page Builder to Build Page
      • How to Change Page Title
      • Page Settings
    • Menu
      • How to Create a Menu
      • How to Edit Menu
    • Header
      • How to set the default Header Style
      • How to customize the Header Style
    • TopBar
      • How to enable the default Topbar
      • How to customize the Top Bar Style
    • Page Title
      • How to Customize Page Title
    • Footer
      • How to Create a Footer Style
    • Slider
      • How to Create a New Slider
      • How to Edit Your Slider
    • Post
      • How to Create a New Post
      • How to Create a Category
      • How to Create a Blog Archive Page
    • Widget
      • How to Add Widget in Sidebar
      • How to Edit Widget
    • WooCommerce
      • Set up an Online Store
      • How to Customize Your Online Store
    • FAQs
      • What are Common Installation Issues
      • How to Change Color
      • How to Change Contact Information
      • How to Change Logo
  • How to Edit a Menu

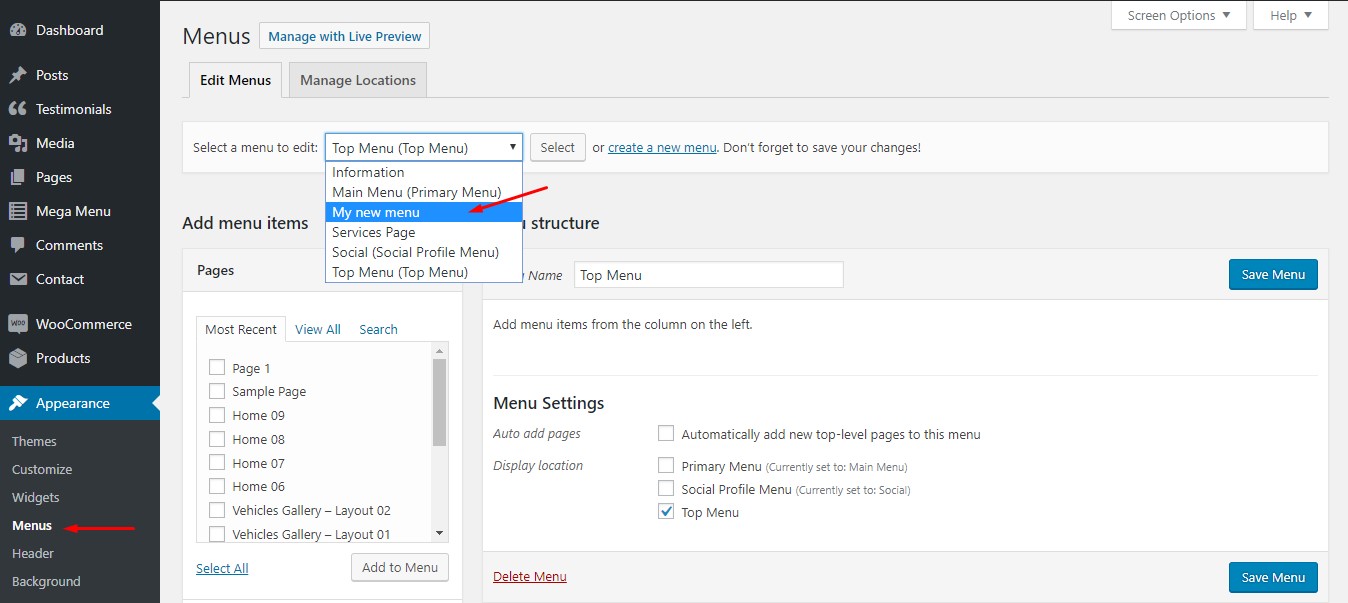
    Step 1: Go to Appearance > Menus on admin sidebar, select a menu to edit.

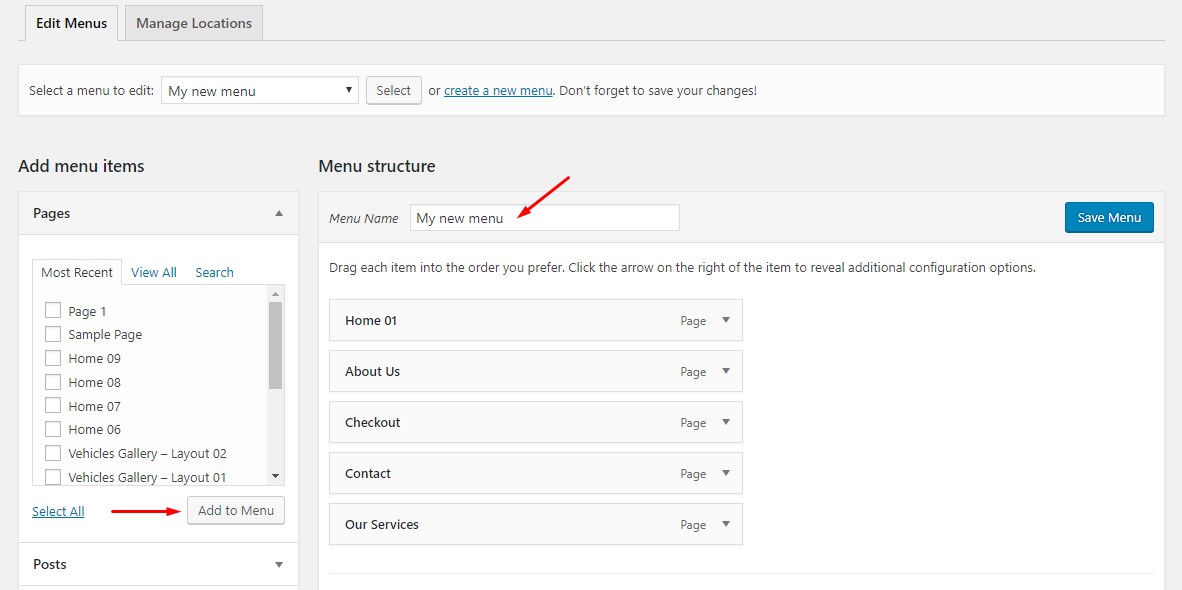
    Step 2: Rename menu name as you wish. If you want to add more menu items, choose them from the left and hit Add to menu.

    With each menu item, you can rename or drag to make it sub-menu.

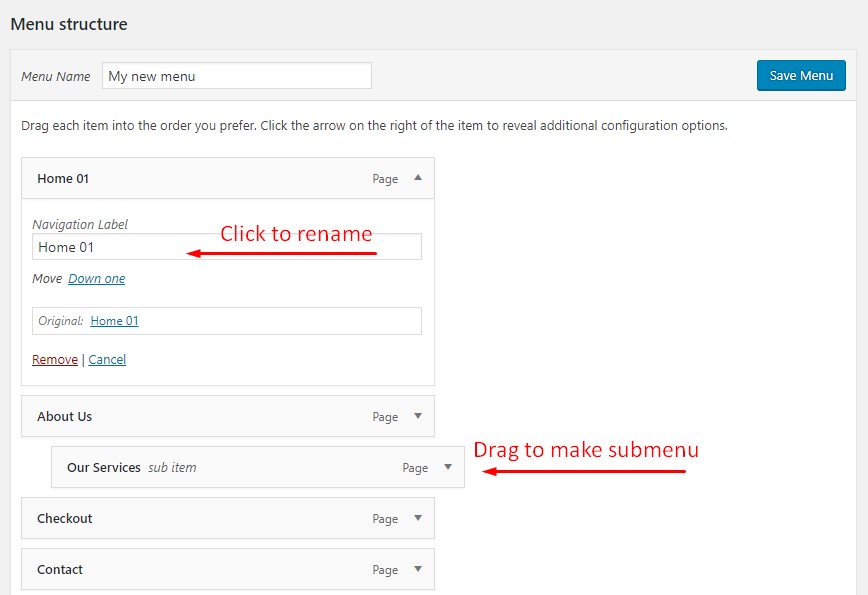
    Remember to hit Save Menu when you finish editing.

    How to Create a Menu
    Next: How to set the default Header Style